
Good roller shutter door maintenance starts before a door jams. For warehouse and facility teams, the useful routine is straightforward: keep the opening clean, notice changes in movement, protect the aluminum finish, and arrange qualified servicing before a small defect becomes a breakdown.
This guide explains how to maintain an aluminum roller shutter door through a practical cleaning and inspection workflow. It separates tasks trained operators may perform from adjustments that belong to a door technician. Use it alongside the instructions for your installed shutter, motor, controller, and safety devices.
Aluminum describes the curtain material, not the entire operating system. Two similar-looking aluminum roller shutter doors can have different finishes, guide inserts, drives, and protective equipment. Those differences determine the approved cleaning products, lubrication points, and service intervals.
Contents
- 1 Before You Start: Identify the Door and Make the Area Safe
- 2 Step 1: Clean the Aluminum Roller Shutter Door Curtain
- 3 Step 2: Keep Guides, Seals, and the Threshold Clear
- 4 Step 3: Choose Roller Shutter Door Lubricant by Component
- 5 Step 4: Observe Operation and Check Protective Devices Correctly
- 6 A Practical Roller Shutter Door Maintenance Checklist
- 7 When Maintenance Becomes a Repair Job
- 8 Frequently Asked Questions
- 8.1 Can I wash an aluminum roller shutter door with ordinary detergent?
- 8.2 Should I grease the roller shutter door side guides?
- 8.3 Does aluminum mean the door is maintenance-free?
- 8.4 Can staff test the safety edge by standing under the door?
- 8.5 What should I do if the door becomes noisy after cleaning?
- 8.6 Should I keep operating a door after a small vehicle impact?
- 9 Plan the Next Maintenance Action
Before You Start: Identify the Door and Make the Area Safe
Find the roller shutter door identification label and the operating manual. Record the door reference, controller model, installation date if known, and the contact responsible for servicing. Keep these details with the maintenance record so a different shift can report a problem accurately.
Plan roller shutter door cleaning around the operating schedule. Separate the area from pedestrian and vehicle traffic, and prevent another person or automatic control from starting the door. Follow the site’s isolation procedure before touching or cleaning the equipment. A stop button is not an electrical isolator, and cutting power does not remove stored mechanical energy.
Only clean surfaces that are safely accessible with the door in the condition specified by its manufacturer. Do not stand beneath a stalled curtain, climb on the bottom rail, or remove the hood to reach the barrel. Work at height and work around springs, brakes, supports, or electrical components require suitable competence and a planned method.
Stop if the door already shows damage
A tilted curtain, displaced slat, loose guide, damaged support, exposed wire, or unexpected movement changes the task from routine cleaning to fault assessment. Keep the opening out of service and arrange qualified inspection. Do not cycle a damaged door simply to see whether the problem clears.
For a manual roller shutter door, a sudden increase in operating effort also deserves attention. Extra force can conceal a developing mechanical problem. For a motorized shutter, repeated stopping or reversing should be recorded rather than treated as a reason to increase force or change limits.
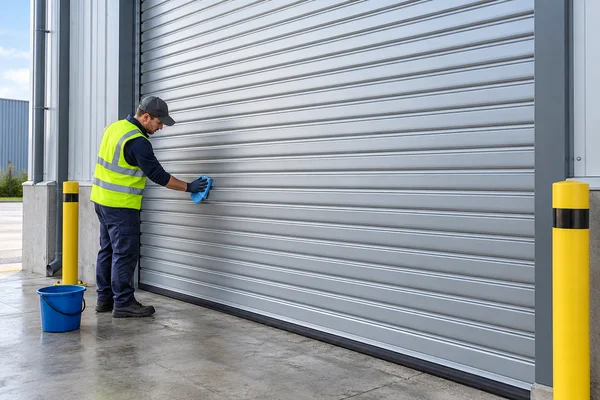
Step 1: Clean the Aluminum Roller Shutter Door Curtain
First establish whether the slats are anodized, powder coated, painted, or otherwise finished. Ask the supplier for the care instructions if the finish is unknown. A product suitable for one coating may be unsuitable for another, and the word “aluminum” on a cleaner is not enough to establish compatibility.
- Secure the equipment and prepare soft, clean cloths and the manufacturer-approved cleaning solution.
- Remove loose surface contamination using the permitted method. Avoid grinding grit into the finish with a dry cloth.
- Clean accessible slat faces gently in manageable sections. Do not force cloths or tools into interlocking joints.
- Remove cleaning residue as directed, keeping water away from controls, motors, cables, and electrical enclosures.
- Dry or allow the surface to dry according to the finish instructions, then check for marks or coating damage that dirt may have concealed.
Some manufacturers specify mild, neutral, non-abrasive cleaners and soft cloths. For example, the Hörmann HR 120 manual gives those instructions for its door curtain. Treat that as a model-specific example, not permission to use the same product on every shutter finish.
Avoid abrasive pads, metal scrapers, and unapproved solvents. Do not use pressure washing as a shortcut unless the installed door’s instructions expressly permit the equipment and method. Water driven into joints or electrical components can create a problem that is not visible immediately.
What if the entrance faces salt, dust, or chemical residue?
Tell the roller shutter door supplier about the exposure and ask for a suitable cleaning plan. A sheltered warehouse entrance and an exposed coastal loading opening may need different attention. Do not assume that corrosion-resistant aluminum makes the complete assembly maintenance-free: fasteners, brackets, coatings, and electrical parts also need assessment.
Record where contamination returns. A repeated deposit near one guide may point to nearby processes or vehicle traffic. Preventing the source of contamination can be more effective than repeatedly cleaning the same spot.
Step 2: Keep Guides, Seals, and the Threshold Clear
Look at both sides of the opening before touching anything. Check for loose packaging, grit, pallet wrap, and objects near the bottom rail. Keep the threshold and nearby floor clear so the curtain has an unobstructed path.
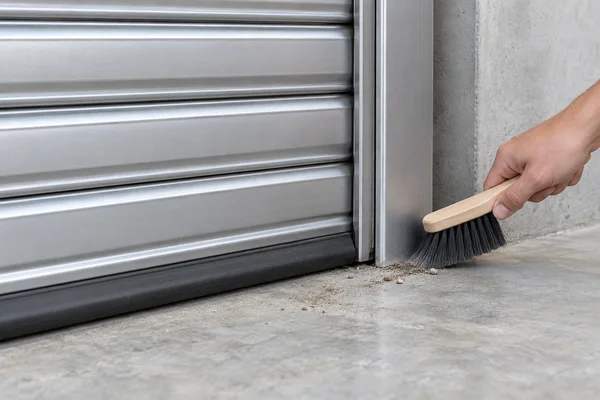
After the door is secured, remove accessible loose debris with a soft brush or another method allowed by the manual. Do not reach into a guide, pull out trapped material, or loosen a guide anchor to create clearance. A trapped object or a displaced slat needs a technician’s assessment.
Inspect the roller shutter door bottom seal and guide brushes or inserts, where fitted. Look for tears, missing sections, displacement, and fresh rubbing marks. Report the location and extent of damage. Do not trim a seal because the door seems to close against it; that can hide an incorrect position setting or another defect.
Compare the two guides from a safe position. A gap, bent edge, impact mark, or visibly loose fixing should be logged and referred for inspection. Cleaning does not correct guide distortion, and a door that still travels may have damage that compromises retention.
Keep housekeeping separate from mechanical adjustment
A useful operator task is removing an empty carton from a secured doorway. Straightening metal, changing guide alignment, adjusting curtain attachments, or tightening structural fixings without specifications is a different job. Give the service team clear photographs instead of attempting an improvised repair.
Step 3: Choose Roller Shutter Door Lubricant by Component
There is no single roller shutter door lubricant that belongs on every part of every shutter. The approved product, application point, quantity, and interval depend on the design. Some guide interfaces use inserts or brushes whose care instructions differ from those for bearings or drive components.
Read the lubrication section of your roller shutter door manual. If it does not identify a component as an operator lubrication point, do not spray it as a precaution. Ask the supplier to identify the correct product and who should apply it.
- Do not coat the entire curtain or fill the side guides with grease.
- Keep lubricant away from sensor lenses, electrical devices, braking surfaces, and materials for which compatibility has not been established.
- Do not treat a general-purpose penetrating spray as an automatic substitute for the specified lubricant.
- Do not remove a hood or drive cover merely to find somewhere to lubricate.
New scraping, squealing, or increased resistance calls for diagnosis. Lubricating until the noise becomes quieter may leave the underlying alignment or wear problem unresolved. Record when the sound occurs, which side it comes from, and whether the curtain remains level.
Step 4: Observe Operation and Check Protective Devices Correctly
After cleaning, restore the area and equipment according to the approved return-to-service procedure. If the roller shutter door has no unresolved fault and it is safe to operate, a trained operator can observe a normal cycle from outside the travel zone. Keep the entire opening visible and clear.
Watch for uneven movement, a changed stopping position, scraping, hesitation, or unexpected reversal. Note whether the bottom rail remains level and whether the door reaches its usual open and closed positions. Do not run repeated cycles solely to reproduce a concerning fault.
A roller shutter door sensor may be a photocell, a monitored edge, or another device, depending on the installation. Keep accessible external sensor surfaces clean only by the permitted method. Do not move brackets, bridge terminals, disconnect safety inputs, or infer a device’s condition from an unfamiliar indicator color.
Visual checks do not replace functional testing
A clean lens does not prove a protective function works. Use the exact functional test specified for the fitted device, with the required test object, method, and competent person. Never use a person’s body or a vehicle as the obstacle for a test. If you do not have the procedure, arrange a qualified check.
Controls, interlocks, emergency stops, and manual operation arrangements also vary. The available configurations are outlined on our electric roller shutter door page; your installed equipment documentation determines the maintenance procedure.
Record roller shutter door error codes exactly before anyone resets the controller. A reset can remove useful diagnostic information without fixing the cause. Do not change force settings, closing limits, or operating modes to work around a protective stop.
A Practical Roller Shutter Door Maintenance Checklist
Use the following roller shutter door maintenance checklist as a record structure. Assign each task to a trained operator or qualified service provider according to the equipment instructions. The suggested occasions below organize the work; they do not replace the manufacturer’s required schedule.
| Occasion | Check or task | Record and response |
|---|---|---|
| Before normal operation | Clear travel area; visible damage; known outstanding faults. | Keep out of use if an unsafe condition is present. |
| Planned accessible cleaning | Approved curtain cleaning; loose debris; visible seal and guide condition. | Record product used, observations, and any defect referred. |
| Normal operation after checks | Travel, sound, level curtain, usual stopping positions. | Record changes; stop repeated attempts if behavior is abnormal. |
| Manufacturer-specified service visit | Mechanical assembly, drive, protective devices, settings, and required functional tests. | Keep the technician’s findings, work performed, and return-to-service decision. |
| After impact or another abnormal event | Qualified assessment of affected components before reuse. | Record the event and isolate the opening as the site procedure requires. |

How often should an aluminum roller shutter door be serviced?
Start with the installed manufacturer’s schedule and the service provider’s assessment. Operating frequency, environment, contamination, and impact exposure all matter. Avoid selecting an interval just because a generic article recommends monthly or annual maintenance.
The UK Roller Shutters operating and maintenance manual includes service records and relates inspection frequency to use. Its instructions apply to the equipment it covers; use your own manual and documented site assessment to set the actual schedule.
Review the plan when the application changes. A door formerly used a few times per shift may later serve a busy dispatch route. Increased use, new washdown procedures, nearby construction, or changed traffic patterns should prompt a conversation with the supplier rather than an assumption that the old plan still fits.
What to include in the roller shutter door maintenance log
- Door identifier, location, model, and the relevant manual or service reference.
- Date, responsible person, and the task performed.
- Cleaning product or specified lubricant used, including the application point where relevant.
- Observed damage, abnormal movement, controller indication, and supporting photographs.
- Action taken, restrictions on use, and the person responsible for follow-up.
- Service findings, test results, and the next scheduled action.
Write observations rather than guessed causes. “Fresh scrape on the right guide after a pallet impact” is more useful than “motor problem.” If an issue remains open, make it visible to the next shift rather than leaving it only in an individual employee’s messages.
When Maintenance Becomes a Repair Job
Arrange qualified roller shutter door repairs when you find damaged slats, displaced guides, recurring stops, unexpected movement, loose supports, or electrical damage. Springs, barrels, brakes, drive assemblies, and curtain attachments can retain or control substantial loads. They are not routine operator adjustment points.
Prepare the roller shutter door reference, photographs taken from a safe position, the symptoms, and the history of any impact or recent work. Ask the technician to establish the cause and identify the checks needed before the door returns to service. A single successful closing cycle is not a complete safety assessment.
If several entrances have similar doors, identify the affected unit clearly. Parts and settings from the neighboring shutter may not be compatible even when the curtains look identical. Keep replacement recommendations tied to the actual model and installation.
Frequently Asked Questions
Can I wash an aluminum roller shutter door with ordinary detergent?
Only if the finish manufacturer’s care instructions approve that type of product. Use the specified dilution and method. If the coating is unknown, ask the supplier before applying a cleaner across the curtain.
Should I grease the roller shutter door side guides?
Only where the installed manual expressly requires it. Guide inserts and brushes can have different care requirements, and indiscriminate greasing can collect contamination. Have binding or scraping investigated rather than trying progressively more lubricant.
Does aluminum mean the door is maintenance-free?
No. The curtain finish, guides, seals, supports, controls, and any drive or protective devices still need the care specified for the system. Plan maintenance around the complete installed assembly.
Can staff test the safety edge by standing under the door?
No. Follow the manufacturer’s prescribed test procedure and use competent personnel and the required test equipment. A person must not serve as a test obstacle.
What should I do if the door becomes noisy after cleaning?
Stop if the noise suggests rubbing, distortion, or abnormal travel. Record what changed and contact the service provider. Do not assume that extra lubrication or a controller reset will resolve the cause.
Should I keep operating a door after a small vehicle impact?
Take the affected opening out of use and arrange an assessment. Damage to guides, fixings, or curtain components may matter even if the door still moves. Follow the site’s procedure for controlling access while it is inspected.
Plan the Next Maintenance Action
Choose one responsible person for each opening, keep the correct manual available, and make unresolved defects visible across shifts. A useful maintenance routine combines careful cleaning, consistent observations, and qualified servicing at the intervals appropriate to the installation.
For a SEPPES roller shutter door, contact SEPPES with the door model and project reference when you need equipment-specific care guidance or replacement-component advice. Include the site conditions, operating pattern, and clear photographs so the team can review the actual configuration.


